I know I know.... I've been super slow on this. I keep having to wait for parts or different parts, or other different parts to get this thing together. Currently. One problem I ran into is apparently no single place in the country had stainles steel shanks in stock! I ended up having to order mine over ebay. However one of them had a bad coupling nut, so I had to send it back. I'm currently waiting on that before I can complete everything. The kegerator is starting to actually look like something other then a demolished fridge though.
I've also found a super cheap place to have my aluminum CO2 tank refilled. R & D's Fire Control in Newport fills tanks for $1.50 a pound. This would cost me $7.50 to fill my tank! From what I've read most places would charge you $10-$15.

All exposed insulation has now been covered by the vinyl flooring I got.

The fridge will need to be kept at a certain temperature for the kegs. Therefore I'll need something to control the fridge's temperature. I purchased this
external refrigerator thermostat. I drilled a hole straight through the fridge. When doing this, you need to make sure there aren't any coolant lines that run through the wall.

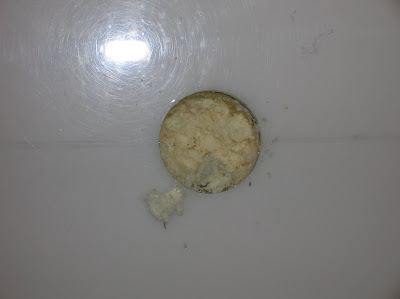
In order to seal up the hole, I used well nuts. I had to cut a slit with the dremmel for the wire to go through.

I've fit the well nut onto the wire. I then glued this nut to both sides of the fridge to help keep any cold air from escaping.
.JPG)
I then took some caulk and, for an extra seal, surrounded the wire nut. Behold my awesome caulking job....
.JPG)
Here's the mounted temperature controller. I have it held up with a 3lb hook magnet.

Here's the holes I cut out for the shanks. The shanks are 7/8" wide, so I used a 7/8" drill bit and some sandpaper so that the shanks fit very snuggly into the holes.
Here's a closeup of the cut hole. There is about 2 inches of foam insulation in the door I had to get through, along with layers of plastic and metal.
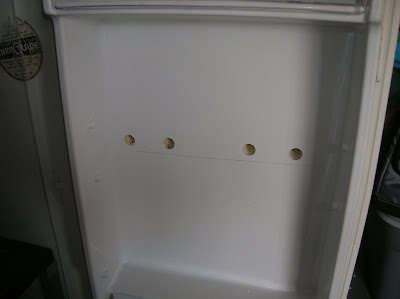
Here are the holes from the inside of the fridge. I'll eventually use an extra piece of the composite wood I used for the table to provide a backing to bolt the shanks to.

I decided I wanted a nice black and wood look to the fridge. I decided to use these precut pieces of wood to provide a nice buffer between the faucet and the fridge.

I used a "Golden Pecan" wood stain as well as 3 coats of polyurathane on the wood to get the desired look.

With more then 1 or 2 kegs in the fridge, you'll need a manifold to distribute the gas. I didn't really know where I wanted to mount mine. I came up with using a old shelf from the fridge. The shelves hooked on to the back wall. I 2/3 of the shelf arm off on one side, and then drilled 2 holes in it. I then used a U-bolt to secure the manifold to the shelf.

Here's a closeup of the manifold. Notice the U-bolt that goes right around the middle of the manifold to hold it up.

Here's a view of the manifold with all the hoses. One of the hoses will go underneath the table to connect the manifold to the gas tank.

I purchased a black wet-erase board online. I'll be able to use liquid chalk markers on this board. They look a lot better then regular dry erase markers.

Here's a look at the stained, poly'd, and mounted wood pieces for the front. I also have 2 of the shanks mounted in them.
That's about it for now. Still waiting on a few pieces before I can complete this baby, but I can't wait till she's set up!


.JPG)
.JPG)