A few of you have been bugging me to finally put up the final pictures of the kegerator. Since I finally have her cooling, serving, and fermenting beer, here's what she looks like:
I needed to find a way to secure the CO2 tank in the back of the fridge...this is what I came up with. Not the most ingenuitive ideas, but hey it gets the job done. The bungee cord pulled the legs on the table towards eachother. In order to mitigate that I attached a piece of thin angled aluminum stock to the two table legs.
Here's another view of the CO2 setup with the tank secured. This should be nice and easy when I have to switch CO2 tanks.
I wanted the temp controller's probe to be close to where I inserted it into the fridge. I took a piece of aluminum left over from the turkey fryer parts I bought when I went to all grain. This allowed me to put a small shelf on the inside of the fridge. I have the temp probe sitting in a beaker of water. This will prevent the fridge from switching on and off more frequently.
Here's a look with the kegs in the bottom of the fridge. That's One Love Wit on the right, and Strawbeery Beach Blonde on the left. Notice the long lines. The friction inside long beer lines help to slow the flow of the beer to the tap. This allows the beer to come out in a nice slow pour instead of 15psi and all foam. For more information on balancing your keg lines, see Kegerators.com
Here's a look at a keg of Schulz Kolsch priming with CO2 on the top shelf. I'll eventually hook this up to tap #3.
The Convenience Center rocks!
Here's the final product on the front. I made the left two tap handles from some wooden figurines I found. The far right one is a Leine's seasonal. I think the wet erase markers look awesome!
Well that's my project! After a few months of off and on work, tons of gluing and polyurythane, and plenty of beer, it's all ready to serve up. It is very nice having beer on tap at your house...however this also leads you to drink ALOT more.
I know I know.... I've been super slow on this. I keep having to wait for parts or different parts, or other different parts to get this thing together. Currently. One problem I ran into is apparently no single place in the country had stainles steel shanks in stock! I ended up having to order mine over ebay. However one of them had a bad coupling nut, so I had to send it back. I'm currently waiting on that before I can complete everything. The kegerator is starting to actually look like something other then a demolished fridge though.
I've also found a super cheap place to have my aluminum CO2 tank refilled. R & D's Fire Control in Newport fills tanks for $1.50 a pound. This would cost me $7.50 to fill my tank! From what I've read most places would charge you $10-$15.
All exposed insulation has now been covered by the vinyl flooring I got.
The fridge will need to be kept at a certain temperature for the kegs. Therefore I'll need something to control the fridge's temperature. I purchased this external refrigerator thermostat. I drilled a hole straight through the fridge. When doing this, you need to make sure there aren't any coolant lines that run through the wall.
In order to seal up the hole, I used well nuts. I had to cut a slit with the dremmel for the wire to go through.
I've fit the well nut onto the wire. I then glued this nut to both sides of the fridge to help keep any cold air from escaping.
I then took some caulk and, for an extra seal, surrounded the wire nut. Behold my awesome caulking job....
Here's the mounted temperature controller. I have it held up with a 3lb hook magnet.
Here's the holes I cut out for the shanks. The shanks are 7/8" wide, so I used a 7/8" drill bit and some sandpaper so that the shanks fit very snuggly into the holes.
Here's a closeup of the cut hole. There is about 2 inches of foam insulation in the door I had to get through, along with layers of plastic and metal.
Here are the holes from the inside of the fridge. I'll eventually use an extra piece of the composite wood I used for the table to provide a backing to bolt the shanks to.
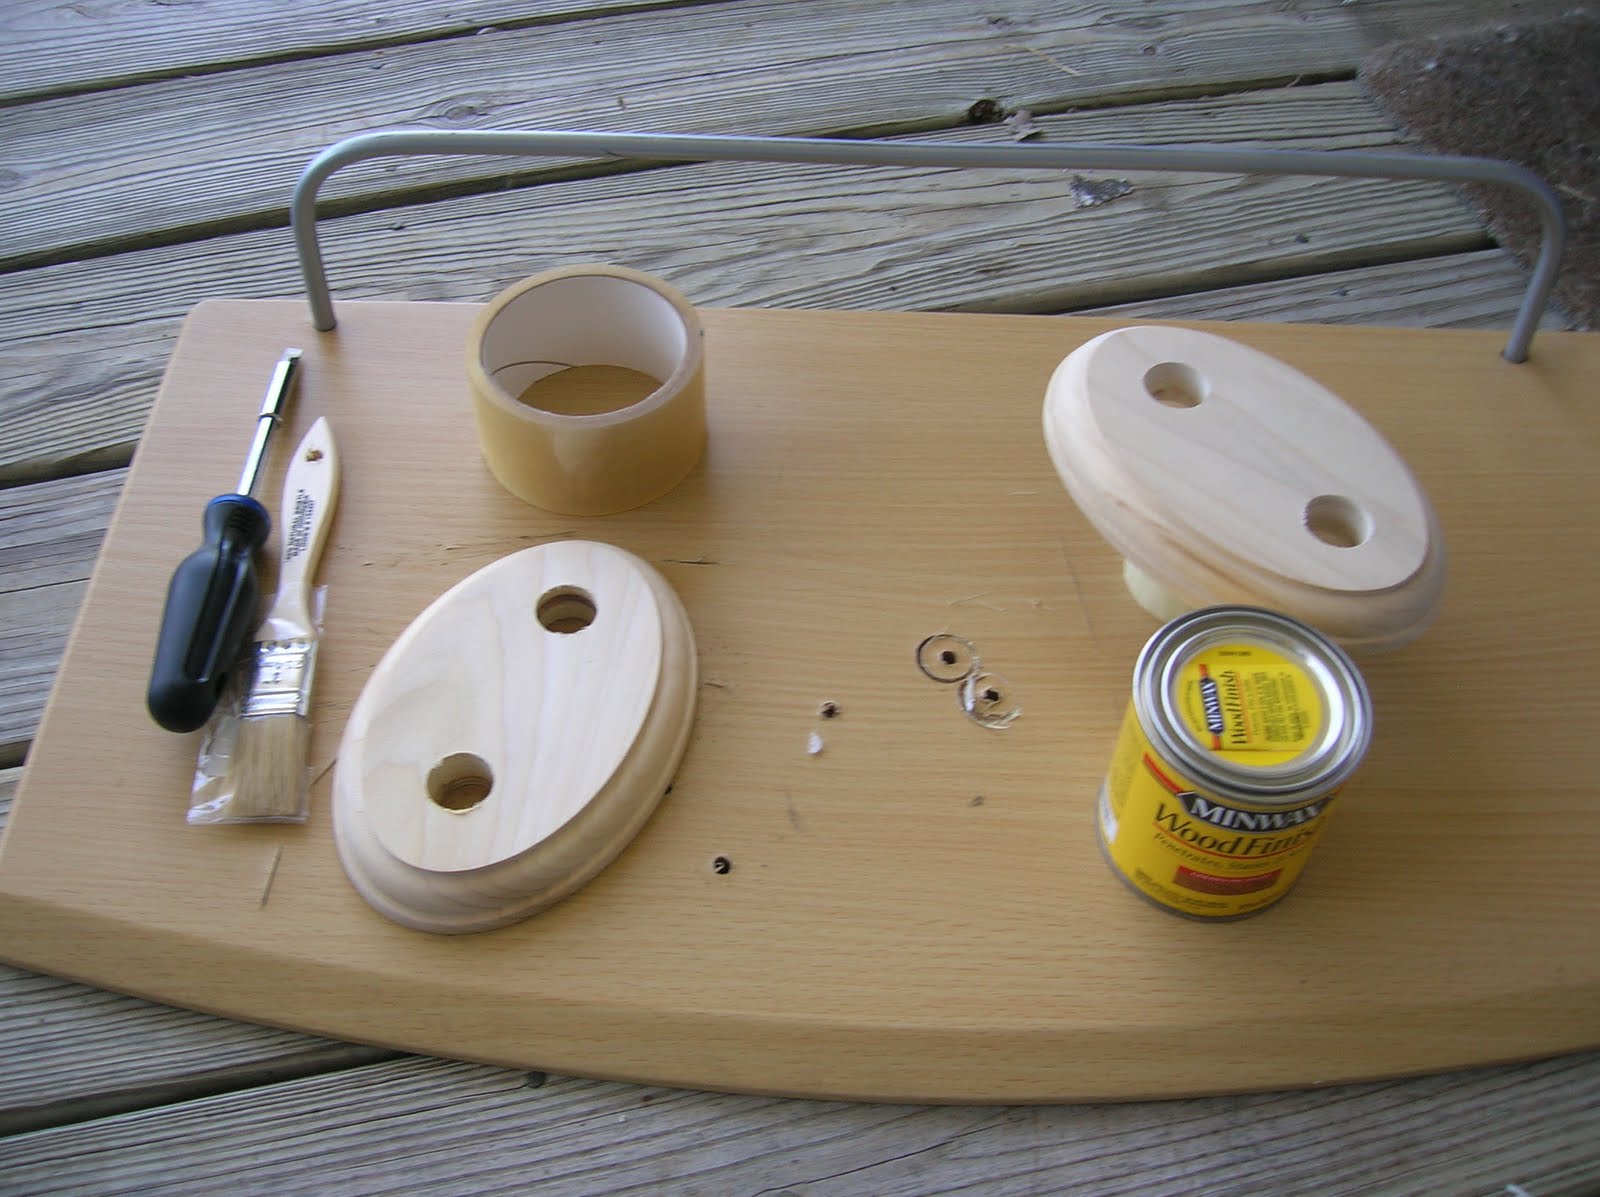
I decided I wanted a nice black and wood look to the fridge. I decided to use these precut pieces of wood to provide a nice buffer between the faucet and the fridge.
I used a "Golden Pecan" wood stain as well as 3 coats of polyurathane on the wood to get the desired look.
With more then 1 or 2 kegs in the fridge, you'll need a manifold to distribute the gas. I didn't really know where I wanted to mount mine. I came up with using a old shelf from the fridge. The shelves hooked on to the back wall. I 2/3 of the shelf arm off on one side, and then drilled 2 holes in it. I then used a U-bolt to secure the manifold to the shelf.
Here's a closeup of the manifold. Notice the U-bolt that goes right around the middle of the manifold to hold it up.
Here's a view of the manifold with all the hoses. One of the hoses will go underneath the table to connect the manifold to the gas tank.
I purchased a black wet-erase board online. I'll be able to use liquid chalk markers on this board. They look a lot better then regular dry erase markers.
Here's a look at the stained, poly'd, and mounted wood pieces for the front. I also have 2 of the shanks mounted in them.
That's about it for now. Still waiting on a few pieces before I can complete this baby, but I can't wait till she's set up!
Well, I've finally had enough with bottling. I mean we have probably 300 bottles in our house. They take up too much freaking room!! With the amount that we currently brew, bottling just takes up too much extra time. So it's time to Keg!!!
The side by side fridge that we picked up last year will be the kegerator. However, the problem with a side by side fridge, is that you have this big ass wall halfway between the freezer and fridge section. It takes up a lot of space! Solution? As Ronald Regan probably would have said it:
"We welcome beer and soda; for we believe that carbon dioxide and malt beverage go together, that the advances of brewing beer can only strengthen the cause of world peace. There is one sign that Jeremy can make, that would be unmistakable; that would advance dramatically the cause of freedom and peace. Jeremy Ryan Schulz, if you seek peace, if you seek prosperity for Eastern North Carolina, if you seek liberalization, come here to this refrigerator. Mr. Schulz, open this door. Mr. Schulz, TEAR DOWN THIS WALL!"
Can't argue with Reagan!
Here's a bunch of pics from the build!
Here's the refrigerator before anything is done to it. Time to demolish!!
The first step was to cut through the wall. I used a dremel for most of it, because the plastic was quite thick. For touching up later I would eventually use a utility knife.
The insulation was in there pretty good. They must use a ton of glue at the fridge factory!
All of the center insulation has been removed. I left about 2 feet of wall to support a second level on the fridge side.
The ice machine remnants were the next to go. Screws started coming out of this thing left and right! Since we've had the fridge, there has always been an annoying rattling noise when fridge shuts off. I always attributed this to issues with the compressor (perhaps a loose bolt). However with the ice machine off, I could see the problem. The evaporator fan motor was the problem. Upon removing it, I found that the bearings were shot.
So with a ton of digging (thank god for the internet), I was able to find a spare motor/fan assembly (Our fridge is not what you would consider "name brand"). I found the assembly from Timer King. It turns out Timer King is a family owned business up in Superior, WI! Yeah Sconnie! Represent! (Plus the free shipping rocked). Here's me holding up the defunct motor/fan next to our shiny new (quiet) one.
The ice maker dispenser in the door had to go. Not only is this thing barely insulated, but the mildew growing up inside it was turning my stomach. Here's the back of the assembly.
Since removing the assembly left a ton of empty space that was not covered by insulation, I sprayed a ton of Great Stuff into it. This helped to seal it up, and provide some strength to the gap that was created.
The nice thing about having the left over Great Stuff was that I was able to fill the lids to my mash tun and hot liquor tank. This allowed me to up the R-value, so my mash temps would stay more stable. Bonus!
I sealed the inside (where the ice would normally fall into the ice dispenser with a spare chunk of plastic that I had previously cut out of the middle.
I was tempted to take the front of this off, and replace it with plain plastic, however I just couldn't due to the words on the front. "Convenience Center". Well the "Convenience Center" will now be a convenient place to set my beer! I'll eventually sand the excess Great Stuff out of there and seal it up with some caulk.
Next I sanded and smoothed all the insulation/plastic where I had previously cut.
Proper attire is needed when sanding insulation. Proper attire is also needed when robbing banks. I'm set for both.
I used Gorilla Glue (best glue ever) to seal the insulation back to the plastic. Gorilla glue requires clamping of the materials for about one hour.
I wanted something that would seal up the bare insulation. I thought about using plastic pieces from hole I cut, but I wouldn't get a good enough seal. I ended up going to a local carpet/flooring store, and asking for some old vinyl flooring. They let me peruse their dumpster, and I found some pieces just the size I was looking for. Color on the other hand....is a bit off, but oh well it's free!! :-)
I removed the back of the fridge door in order to put on the braces for the drip tray. Holy mildew Batman! Get the bleach!
I picked up some corner brackets from Lowes for a few bucks. Using 3 inch bolts, I secured them to the door. The drip tray will sit across these brackets.
I used fender washers as well as an extra bracket I cut in half for the back of the door.
Well that's all I have finished so far. As parts start coming in, and more time allows I'll post the new updates! Thanks for reading!
On Deck: Granola Brown Ale The Hop Doctor (Good for what ales you)
Bottled/Kegged: Gluten Free Beer Schulz Kolsch Strawbeery Beach Blonde Ale One Love Wit Organic Blueberry Wine Blueberry Ale IWPA (Indian Wedding Pale Ale) Inspired by Manan's Wedding Brother John's Abbey Ale Honey Chocolate Smoked Porter
Beer Brain Limbo: Nuannaarpoq Duppy Conqueror
Beer Gone But Not Forgotten: Brewers Best Kolsch Brewers Best Red Ale Brewers Best Weizenbier (Ale)head Turtle Man's Best Friend (All Grain) Earth Day Organic Brown Ale (All Grain)


.JPG)
.JPG)